Step 1:
Open your image in Photoshop. I used the same image from the lomo tutorial.

At the bottom of the tool bar, click on the foreground color and change it to an orangey red color. I selected PANTONE Hexachrome Orange from the colors library.

Step 3:
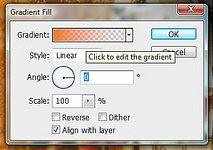
The next step is creating a gradient fill layer. To do so go to Layer>New Fill Layer>Gradient which will open up a dialogue box. In the box, the Gradient Style should be Linear. The Angle depends on the specific look you want. 180 degrees will create a gradient on the right side, 0 degrees will create a gradient on the left side. 90 degrees will create a gradient on the bottom, -90 will create a gradient on the top.
Step 4:
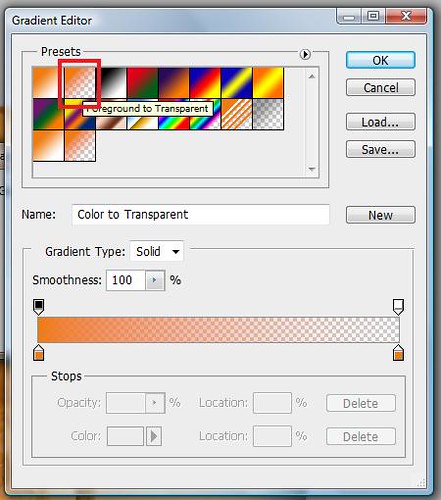
Click on the gradient drop down menu (it says click to change the gradient). In the new dialogue box, set the gradient to Foreground to Transparent which is the second option.
Step 5:
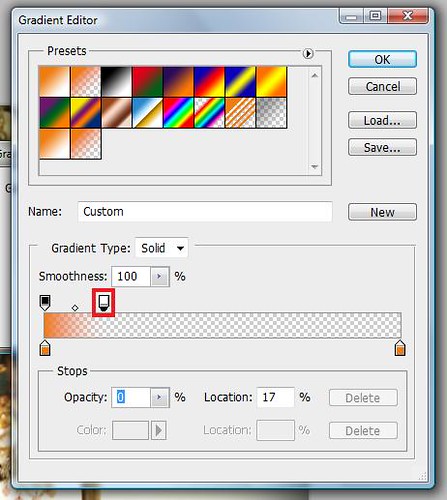
In the same dialogue box, move the transparency sliders closer together. Move the top right slider closer to black slider. This moves the gradient to one side of the image. If you don't do this you will have a "light leak" over your entire image. When finished click OK and return to your image.
Step 6:
There should now be an orange streak on the side of your image. Now you can change the blending mode of the gradient layer. I chose color dodge because it created the best light leak for this image. Another blending mode to try is Vivid Light. With any image, it is best to experiment with different blending modes until you have found the blending mode that you like best.

Step 7:
You can always go back and change the gradient if you aren't satisfied with the light leak by double clicking on the gradient fill layer. I moved the light leak to the top and created a second one on the bottom to make it look as if the film wasn't wound tightly enough and leaked in from the top and bottom. To duplicate a layer, with the layer selected, go to layer>duplicate layer. I copied the layer and changed the angle to 90 degrees and -90 degrees.

You are finished. Don't forget to save your image and leave your results in the comments section. In the next few weeks, I will be adding alternate ways of creating light leaks in photoshop.
Nice post! Glad I found this blog.
ReplyDeleteIf you into photography, check out mine. I'm a photographer.
www.electricbrandon.com
If you want, follow it and I'll do this same. Thank you!
Wow, this tutorial really helped me. I have been searching for a good tutorial on the web but there's not much out there so I always end up using action packs instead. Thank You very much, you have shown me the way. ;P) http://benzykaram.blogspot.com/
ReplyDelete